Proxmox Backup Server on a dedicated fast backhaul network

Once again, I just had to make things difficult for myself. 😉 Most people would either dedicate an entire machine to Proxmox Backup Server and call it a day or run PBS in a VM on an existing machine.
In my case, I have a three-node high-availability Proxmox VE cluster with Ceph storage. Each is an identically configured, maxed-out Late-2018 i7 Mac mini with onboard gigabit Ethernet. These nodes communicate with each other over a dedicated 2.5Gbps backhaul network using 2.5G USB-to-Ethernet adapters.
I need to eventually upgrade this to a 10G network, but I’m waiting until I can find a deal on Thunderbolt 10G network adapters. (They’re currently ~$150 each and I need three of them, plus a switch. Ouch.)
Rather than run PBS as the only service on the backup host, I installed Proxmox VE and am running PBS in a virtual machine so that I can run Open Media Vault in it’s own virtual machine.
Why?
Because no one in my family backs up their stuff.
I configured the backup host with enough storage for all of my containers, VM’s, and media plus backups for four Macs, all with a 22TB ZFS-mirror.
Open Media Vault makes it easy to set up SMB shares using the underlying Ceph storage so that the Macs can regularly backup over the network.
When a Mac boots up and someone logs in, the machine automatically mounts its respective SMB share and will silently run a Kopia CLI backup every hour. (That’s a totally different blog post, but I touch on some of it here.)
In order to make all of this work, I needed to configure the PBS VM to use the backhaul network (10.42.1.0/28) for backup traffic while maintaining the PBS management interface (172.16.30.208). This required:
- Configuring the second network interface in the VM
- Setting up proper routing for backup traffic
- Configuring PBS to use only the backhaul network for backups
It should look something like this:

This project was a little more challenging than it sounds given my scenario, so I consulted Claude Sonnet 3.7 along the way.
Step 0: Configure the second network interface on the Proxmox VE host
The backup host I’m using has two 2.5G Ethernet ports, configured as follows:
- Linux bridge
vmrb0backed by the physical portenp2s0and assigned the static IP address172.16.30.45(the gigabit LAN/management network) - Linux bridge
vmrb1backed by the physical portenp3s0and assigned the static IP address10.42.1.4(the 2.5G backhaul network)
Step 1: Configure the second network interface in the PBS VM
With the basics out of the way, now I need to bring up the ens19 interface with an IP address on the backhaul network.
# Edit the network configuration file
nano /etc/network/interfaces
Add the following configuration. The IP address you see below was the next available address in my subnet. Choose whatever makes sense for your network. A gateway isn’t necessary since this subnet is only for inter-node communication and backups.
auto ens19
iface ens19 inet static
    address 10.42.1.5/28
    # No gateway needed on this interface
Apply the changes. I chose to restart networking since a good ol’ restart never hurts anything. (Until it does.) 😉 But it’s fine in this case.
# Bring up the interface
ifup ens19

# Or restart networking
systemctl restart networking
Step 2: Set up routing for backup traffic
Now I need to create a specific routing table for backup traffic. This forces PBS to use the dedicated subnet for backups.
# Edit the iproute2 table names
nano /etc/iproute2/rt_tables
Add a new line:
200 backup
Now set up the routing rules in a script:
# Create a script to set up routing
nano /usr/local/bin/setup-backup-routes.sh
Then add the following content:
#!/bin/bash
# Add a rule to route traffic to/from the backup network via ens19
ip rule add from 10.42.1.5 table backup
ip rule add to 10.42.1.0/28 table backup

# Set up the routing table
ip route add default via 10.42.1.1 dev ens19 table backup
ip route add 10.42.1.0/28 dev ens19 table backup

# Flush route cache
ip route flush cache
Make the script executable:
chmod +x /usr/local/bin/setup-backup-routes.sh
Finally, run the script and make it persistent:
# Run it now
/usr/local/bin/setup-backup-routes.sh

# Add to the script to rc.local to make it persistent
echo "#!/bin/bash" > /etc/rc.local
echo "/usr/local/bin/setup-backup-routes.sh" >> /etc/rc.local
chmod +x /etc/rc.local
Step 3: Configure the PBS VM to use the backhaul network
Configure the PBS VM so that it binds to the backhaul network for backup operations:
# Edit the PBS configuration
nano /etc/proxmox-backup/proxmox-backup.yaml
Add or modify the following sections based on your configuration:
# Listen on both interfaces for management
http:
  listen:
    - 172.16.30.208:8007
    - 10.42.1.5:8007

# Bind backup service to backhaul network
backup-server:
  bind-address: 10.42.1.5
You can now restart the PBS backup service. I had some trouble with this because there are many Proxmox services related to backup:
- dpkg-db-backup.service #Daily dpkg database backup service
- proxmox-backup-banner.service #Proxmox Backup Server Login Banner
- proxmox-backup-daily-update.service #Daily Proxmox Backup Server update and maintenance activities
- proxmox-backup-proxy.service #Proxmox Backup API Proxy Server
- proxmox-backup.service #Proxmox Backup API Server
- dpkg-db-backup.timer #Daily dpkg database backup timer
- proxmox-backup-daily-update.timer #Daily Proxmox Backup Server update and maintenance activities
Just reboot the VM as it accomplishes the same goal.
Step 4: Configure the Proxmox cluster to use the backhaul network for backups
Everything from this point is accomplished using the Proxmox UI.
- Go to Datacenter > Backup in your cluster
- Select Add and decide which containers or VM’s you want to backup, then save your selections. Don’t worry about setting Retention policy - you’ll do this in PBS. Ditto for Schedule.
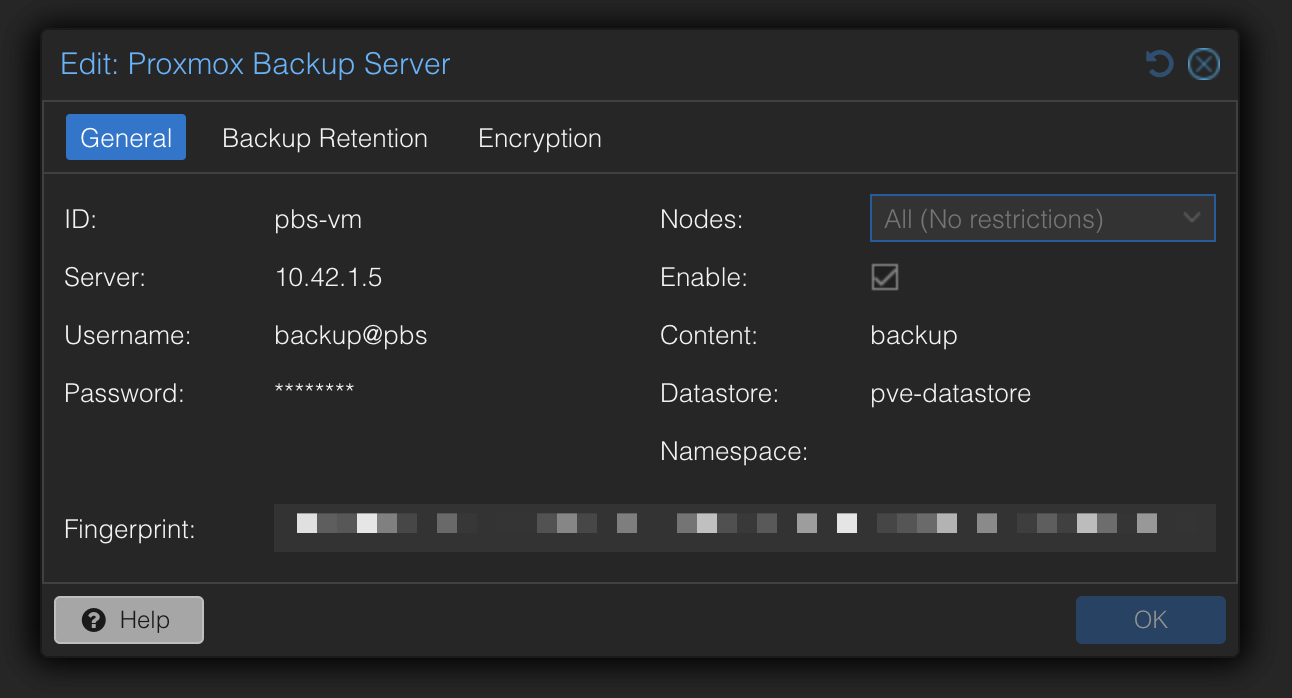
- Go to Datacenter > Storage
- Select Add > Proxmox Backup Server
- Assign a name to your PBS instance in the ID field. It doesn’t matter what you call it, as long as you can identify it. I named mine
pbs-vm. - Enter the IP address in the Server field. This is the IP address used on the backhaul network IP (e.g.
10.42.1.5), not the Management interface (e.g.172.16.30.20) - If you haven’t already done so, create a new user in PBS with permissions to manage this datastore and enter it in the Username field. I created a user named
backupand gave it just enough rights to manage the datastore and nothing more. - Enter your chosen credentials in the Username and Password fields.
- In the Nodes field, select All.
- Make sure Enable is checked.
- In the Datastore field, enter the name of the datastore you created on your PBS instance. (e.g.
pve-datastore) - Enter the Fingerprint of the datastore on your PBS instance. You can find this value in PBS. When logged in as root, go to Datastore and select the name of your datastore. Select Show Connection Information and it will display all relevant information related to your datastore, including the Fingerprint. Copy and paste it into the Fingerprint field in your cluster’s Datacenter manager.
- Select Encryption. It’s easiest to select Auto-generate an encryption key. Make sure you save and print your key because you won’t be able to access your files without it. This is especially important if you’re going to be pushing your backups off-site, as I will.
Step 5: Test your configuration
Go back to the PBS web interface and start a manual backup. Once that’s working, set up your automated Prune and Garbage Collection tasks.